FixForge › RV › Awning Fabric Replacement
RV Awning Fabric Replacement
Awning fabric is the most exposed material on an RV — constant UV, occasional storms, and a 10-15 year service life regardless of how careful you've been. Replacement is mechanically simple but physically awkward. Two people, 60-90 minutes, $150-400 in fabric, and you skip a $450-1100 service-center bill.
Last Updated: May 2026
Fast answer before ordering fabric
Identify your awning brand: A&E/Dometic or Carefree. Measure the fabric (NOT the rail-to-rail awning length) — the fabric is roughly 8 inches shorter than the advertised awning size. Order vinyl or acrylic fabric specifically labeled for your awning brand with the correct polyrod diameter (5/16 inch for A&E/Dometic, 7/32 inch for Carefree). You'll need a partner, a flat-bladed screwdriver, and 60-90 minutes on a calm day. The whole job is mechanically simple; the difficulty is physical — managing the fabric roll without creasing it or losing tension on the spring.
A&E/Dometic = 5/16. Carefree = 7/32. Wrong cord = won't slide.
Fabric ≈ awning length minus 8 inches.
Even light wind makes the fabric fight you.
One person + a heavy awning roll = creased fabric or injury.
Knowing when fabric is actually done
UV is the killer. RV awning fabric is either vinyl (acrylic-coated polyester) or solution-dyed acrylic (Sunbrella-class). Both degrade under UV, but at different rates and in different failure modes. Vinyl fails by delamination — the acrylic coating separates from the polyester scrim, leaving a sticky, cracking layer that flakes off. Acrylic fails by fade and brittleness — the fabric stays integral but loses water resistance and tears under minor stress.
Both materials have a service life of roughly 10-15 years in moderate climates, 7-10 in hot or coastal climates, and 5-7 in extreme exposure (Arizona summers, full-time use without retraction). After year 8, inspect annually for the failure signs:
- Delamination: rub your hand across the fabric. If you feel a sticky residue or see flakes, vinyl coating is failing. Patching is pointless.
- Brittleness: press a fingertip firmly into the fabric. If you can hear a crackle or see tiny tear lines, the polyester scrim has UV-degraded. Replacement is the only fix.
- Seam failure: inspect the seams (typically along the top edge and at the pull strap). If the stitching has rotted (UV degrades thread faster than fabric), the seams will pull apart with mild stress. One failed seam can be re-stitched; multiple failed seams mean the thread is age-failed everywhere and replacement is more cost-effective than re-sewing.
- Pinholes: hold the fabric up to light. Pinholes throughout the field indicate UV degradation. A few pinholes can be patched with vinyl repair tape; a fabric full of pinholes is done.
The replacement procedure
Fully extend the awning before starting. The fabric needs to be out and flat for the sliding-rail removal step. Once extended, the work is mostly horizontal — standing on a step stool, not a ladder. Don't attempt this on a slope; the awning roll moves under tension and an uneven surface multiplies the difficulty.
- Extend the awning fully and confirm the spring tension is locked. Most awnings have a tension lock on one end — engage it so the roll doesn't spin when fabric exits the channels.
- Remove the end caps from both ends of the roller tube. Usually 2-4 screws each. Some caps cover spring access; don't remove the spring itself unless you have a spring rewinding tool and know how to use it.
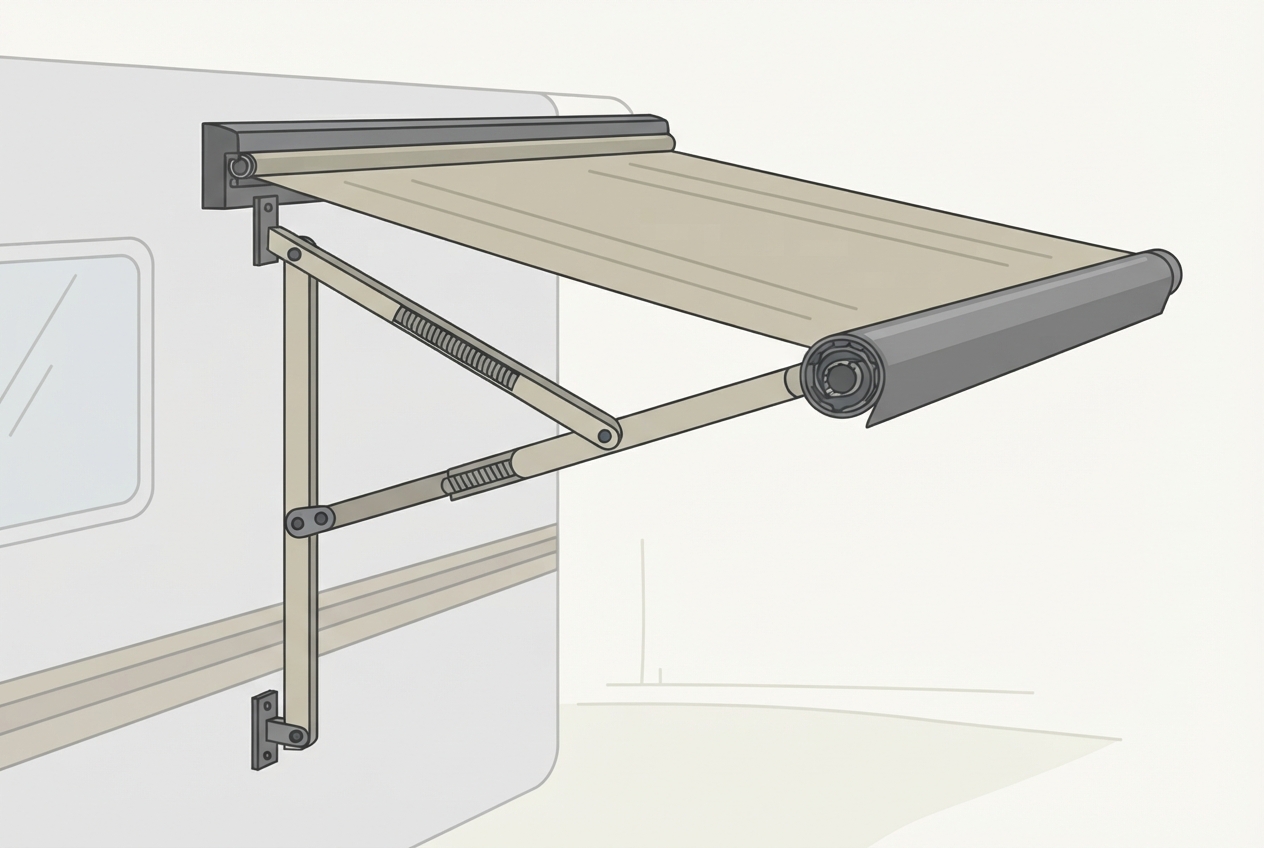
- Identify both polyrod channels: one along the top of the awning rail (where fabric enters the wall-side channel) and one along the roller tube (where fabric enters the roller channel).
- Loosen the set screws on one end of each channel. Don't remove them completely — just back them off enough that the polyrod can slide.
- Have your partner support the fabric weight while you carefully slide the fabric out of the rail-side channel from one end. The polyrod is what holds the fabric in the channel; once you start sliding it out, gravity wants to take over.
- Lower the fabric and slide it out of the roller-side channel. The fabric is now free.
- Inspect the channels for debris or damage. Clean any old caulk, twigs, or oxidation out of the channel grooves. A clean channel is essential for the new fabric to slide.
- Take the new fabric, identify its top edge (the polyrod is sewn into the top, not bottom). Confirm the cord diameter matches your awning's specification.
- Slide the new fabric into the roller-side channel first. Start at one end, feed the polyrod into the channel, and slowly slide it through. Your partner supports the fabric tension to prevent crease. Continue until the polyrod is fully in.
- Slide the top edge polyrod into the rail-side channel. Same process — one person feeds, the other supports tension.
- Re-secure the set screws on both channels. Don't overtighten — just enough to prevent slippage.
- Reinstall end caps.
- Retract the awning slowly and confirm even tension. If the fabric is uneven or wrinkling, the polyrod may not be seated correctly — extend again and adjust.
2026 cost reference
| Item | Typical 2026 cost | Notes |
|---|---|---|
| Vinyl fabric (15 ft, A&E/Dometic) | $130-200 | Standard durability. Lighter weight than acrylic. |
| Vinyl fabric (17-19 ft, A&E/Dometic) | $180-280 | Larger awnings. |
| Solution-dyed acrylic fabric (Sunbrella-equivalent) | $280-450 | Better UV resistance, 30-40% longer life than vinyl. |
| Polyrod / cord (replacement if old fabric polyrod is undamaged) | $20-40 | Sometimes reused if intact. |
| Vinyl repair tape (for small tear repairs instead of replacement) | $15-30 | EternaBond, Tear-Aid Type B. Patches up to 6 inches. |
| Set screws (replace if stripped) | $5-15 | Standard hardware store stock. |
| Service center fabric replacement (labor only) | $300-700 | Plus parts. Typical total $450-1100. |
When to stop and call a pro
Two scenarios where DIY ends. First: the spring/torsion mechanism is damaged or seized. Spring rewinding requires specific tools and creates serious injury risk if released uncontrolled. Don't disassemble the spring assembly unless you have a rewinding tool and the patience to read the procedure carefully. Second: the awning rail (the bracket bolted to the RV wall) is damaged, bent, or pulling out of the wall. Re-securing or replacing the rail is a structural repair that involves removing sealant, accessing the wall framing, and re-bedding the rail with new fasteners and sealant. This isn't a fabric job and is well outside the scope of routine maintenance.
A&E, Carefree, Dometic. Filter by length.
Check Price on Amazon →As an Amazon Associate, FixForge earns from qualifying purchases.